User Guide: OONI Probe Mobile App
Last updated: 15th April 2025
OONI Probe Mobile version: 5.0.5
Access the user guide in other languages: فارسی, Русский, Deutsch, Türkçe, Tiếng Việt, မြန်မာ

OONI Probe is a free and open source app that you can use to measure internet censorship and other forms of network interference. This user guide provides step-by-step instructions on how to install, run, and customize your use of the OONI Probe mobile app.
What you will get from this guide:
- Learn how to run OONI Probe Mobile to:
- Test the blocking of websites
- Test the blocking of instant messaging apps
- Test the blocking of circumvention tools
- Measure your network speed and performance
- Customize your OONI Probe testing to websites of your choice
- Learn how to access and share your OONI Probe test results
- Configure your OONI Probe app settings
Upon reading this guide, we hope you will feel empowered to share your OONI Probe knowledge and skills with others!
The following table of contents should help with navigating the guide.
Introduction to OONI Probe
OONI Probe is free and open source software designed to measure internet censorship and other forms of network interference. Since 2012, this software has been developed by the Open Observatory of Network Interference (OONI), a non-profit project that was originally born out of the Tor Project.
With the OONI Probe app (available for both mobile and desktop platforms), you can run network measurement tests to check the following:
- Blocking of websites;
- Blocking of instant messaging apps (WhatsApp, Facebook Messenger, Telegram, Signal);
- Blocking of circumvention tools (Tor, Tor Snowflake, Psiphon), OpenVPN;
- Presence of systems (middleboxes) on your network that might be responsible for censorship and/or surveillance;
- Speed and performance of your network and performance of your video streaming.
As soon as you run OONI Probe, your test results are automatically sent to OONI servers, processed, and openly published in near real-time (unless you opt-out of the publication of your test results).
OONI openly publishes OONI Probe test results gathered from around the world to:
- Increase transparency of internet censorship worldwide;
- Share evidence of internet censorship and other forms of network interference;
- Enable the independent verification of OONI censorship findings;
- Support reproducible research;
- Support research, policy, legal, and advocacy efforts around the world;
- Support public debate on information controls.
To enable public access to OONI Probe test results (more commonly referred to as “measurements”), the OONI team makes them available on OONI Explorer: a web platform that provides charts based on measurement coverage and a search tool for exploring the measurements.
As OONI Explorer hosts more than 2 billion network measurements collected from 28,000 networks in 242 countries and territories since 2012, it is likely the largest global open data resource on internet censorship to date.
By running OONI Probe, you will:
- Learn whether and how your Internet Service Provider (ISP) is censoring access to specific websites and apps;
- Contribute measurements that will be publicly archived, enabling the global internet freedom community to monitor, detect, and fight against internet censorship.
This guide aims to walk you through using the OONI Probe mobile app so that you can join a global community measuring internet censorship.
Disclaimer
As OONI Probe is designed to measure internet censorship, running it may be risky for some people in some countries.
Some things to take into account:
- OONI Probe is not a privacy tool. Anyone monitoring your internet activity (e.g. government, ISP, employer) may see that you are running OONI Probe (just the way they can probably see all other software you run).
- OONI Probe is an investigatory tool. Some OONI Probe tests are explicitly designed to uncover internet censorship.
- Your threat model. A high-profile activist already under heavy surveillance, for example, might attract more attention when running OONI Probe.
- The laws and regulations of the country you’re running OONI Probe from. Best to consult with local lawyers.
- The types of websites you test. You might test legally banned (in some countries), provocative or objectionable websites through the use of OONI Probe.
- The types of OONI Probe tests you run. Not all OONI Probe tests carry the same weight in terms of potential risk. OONI Probe, for example, includes the NDT test (designed to measure the speed and performance of a network) which may be viewed as less political or controversial in comparison to other tests designed to measure the blocking of websites or apps.
- Whether you publish your measurements or not. OONI openly publishes measurements collected from OONI Probe users to increase transparency of internet censorship around the world. We do our best not to publish your IP address or any other potentially personally-identifiable information. Learn more in our Data Policy.
To learn more about potential risks associated with the use of OONI Probe, please refer to our relevant documentation.
Installing OONI Probe Mobile
The OONI Probe mobile app is available to download from Google Play, F-Droid, and AppStore.
You can install the OONI Probe mobile app through the following steps:
Step 1. Visit the OONI Probe Mobile installation page (on the OONI website): https://ooni.org/install/mobile
Step 2. Depending on your operating system (Android, iOS), tap the relevant app store button.
Step 3. Install the OONI Probe mobile app (from your app store).

Step 4. Open your OONI Probe mobile app.

Onboarding: Informed Consent
Now that you have installed and opened your OONI Probe mobile app, you will be presented with some basic information about OONI Probe as part of the onboarding process.
You will also learn about potential risks associated with running OONI Probe. To ensure that you understand these potential risks, we have included a short quiz to practically acquire your consent. Answering the quiz questions correctly is a requirement for using OONI Probe.
In the final step of the onboarding process, we share the types of data that are collected by default when running OONI Probe (linking to our Data Policy for further information). You can opt-in to sharing crash reports to help us improve OONI Probe.
Below we walk you through the onboarding process.
Step 1. Once you have read basic information about OONI Probe, tap Got It.

Step 2. The next screen shares a summary of potential risks associated with running OONI Probe. Tap Learn more to read our documentation explaining potential risks.

Step 3. Once you have learned about potential risks associated with running OONI Probe, tap I understand.

Step 4. The following quiz is based on the information you just read in the previous screen. Tap True to demonstrate your understanding of the statement.

You will see that True is the correct answer. If you tap False, you will receive an explanation on why the answer is wrong.

Step 5. Tap True to demonstrate your understanding of the statement (in the second part of the quiz).

You will see that True is the correct answer. If you tap False, you will receive an explanation on why the answer is wrong.
Step 6. If you would like the app to collect the measurements automatically, tap the Yes button.

Step 7. If you would like to share crash reports to help us improve OONI Probe, tap Yes.

Step 8. If you would want to receive notifications about the emerging censorship events in your country, please tap Yes.

Step 9. The following screen shares information about the types of data that OONI collects and publishes by default (every time you run OONI Probe). You can learn more by tapping on OONI’s Data Policy on the screen.

Step 9. Tap Let’s go.
You have now completed the onboarding process and are ready to start using OONI Probe!
Running OONI Probe Mobile
Now that you have completed the onboarding process, you can start running OONI Probe to measure internet censorship!
The Dashboard of the OONI Probe mobile app includes 6 cards, each of which entails OONI Probe tests:
- Websites card. Includes OONI’s Web Connectivity test which measures the blocking of websites.
- Instant Messaging card. Includes OONI’s WhatsApp, Facebook Messenger, Telegram, and Signal tests which check if these apps are blocked.
- Circumvention card. Includes OONI’s Tor and Psiphon which check if these censorship circumvention tools are blocked.
- Performance card. Includes the NDT speed test, the DASH video streaming performance test, and OONI’s middlebox tests (HTTP Header Field Manipulation test and HTTP Invalid Request Line test).
- Experimental card. Includes multiple new experimental tests developed by the OONI team. These tests might change over time. You can view these tests here.
- Installed OONI Run links. Beneath all the cards, you will see a section with the OONI Run links you have installed on your app. You will only see this card if you have installed some OONI Run links. When you first download the app, you won’t see this card. You can read more about OONI Run links here.
Step 1. Tap Run to run your first OONI Probe tests.

Once you tap “Run”, you will see a checklist with all tests available in the current version of the app. Tap “Select all tests” to run all available tests.

Tap “Run tests” button at the bottom of the screen and OONI Probe will launch all tests available (included in all cards) in one go!
If you tap the Running line the fullscale window with ongoing tests will open:


OONI Probe should have run all tests within a few minutes (though this depends on the performance of the network you’re connected to, and may take longer in some cases). If the performance of your network is not good enough and the tests take too long, you can stop the ongoing test by tapping the Stop test button.

Once the tests have ended, your OONI Probe test results will automatically get published on OONI Explorer and on the OONI API.
Would you rather limit your testing to a specific test type (card)? In the following sections, we share instructions on how to do that.
Manually measuring the blocking of websites
If you only want to measure the blocking of websites, you can do so through the following steps:
Step 1. Tap the Run button in the Dashboard of your OONI Probe mobile app.

Step 2. Tap Deselect all tests at the top of the menu.

Step 3. Choose Websites in the menu of available tests.

Step 4. Tap Run 1 test at the bottom of the screen.

You are now running OONI’s Web Connectivity test to measure the blocking of websites.
Your OONI Probe test results will automatically get published on OONI Explorer and on the OONI API. You can opt out from publishing the results in the “Test options” settings of your app.
Which websites are tested?
By default, you will test websites included in the following 2 lists:
- Global test list. Includes internationally relevant websites (such as facebook.com).
- Country-specific test list. Includes websites that are only relevant to the country you’re running OONI Probe from.
No matter which country you’re running OONI Probe from, you will always test websites from the global test list.
OONI Probe will automatically determine which country-specific list to pick for testing based on the country you’re running OONI Probe from. For example, if you run OONI Probe in Brazil, you will test websites from the global test list and from the Brazilian test list. If you travel to Germany and run OONI Probe, it will test the websites from the global and German test lists. But if you’re running OONI Probe from a country which doesn’t have a country-specific test list yet (because it hasn’t been created), you will only test websites from the global list.
If you would like to contribute to the Citizen Lab test lists (which include the default websites tested by OONI Probe users worldwide), please refer to our relevant documentation or use our Test Lists Editor.
Note: To avoid consuming all your mobile data, OONI Probe will only test as many websites as it’s able to test within 90 seconds when you tap “Run” to manually run Web Connectivity test (either from the Dashboard or from the Websites card). These websites (which are tested within 90 seconds) are randomly selected from the global and (relevant) country-specific test lists. Every time you tap “Run”, you will manually test a different, random selection of websites (from the global and country-specific test lists) within 90 seconds. Therefore, the more times you tap “Run”, the more websites you will test.
If you would like to test a larger selection of websites, or test entirely different websites, please refer to the Customizing your website testing section of this guide.
Manually measuring the blocking of instant messaging apps
If you only want to measure the blocking of instant messaging apps, you can do so through the following steps:
Step 1. Tap the Run button in the Dashboard of your OONI Probe mobile app.

Step 2. Tap Deselect all tests at the top of the menu.
Step 3. Choose Instant Messaging in the menu of available tests.

Step 4. Tap Run 1 test at the bottom of the screen.

You are now running OONI’s WhatsApp, Facebook Messenger, Telegram, and Signal tests to measure the blocking of these apps.
Your OONI Probe test results will automatically get published on OONI Explorer and on the OONI API. You can opt out from publishing the results in the “Test options” settings of your app.
If you would like to limit your testing to only WhatsApp, Facebook Messenger, Telegram, or Signal, please refer to the Configuring your OONI Probe settings section of this guide.
Manually measuring the blocking of circumvention tools
If you only want to measure the blocking of censorship circumvention tools, you can do so through the following steps:
Step 1. Tap the Run button in the Dashboard of your OONI Probe mobile app.
Step 2. Tap Deselect all tests at the top of the menu.
Step 3. Choose Circumvention in the menu of available tests.

Step 4. Tap Run 2 tests at the bottom of the screen.

You are now running OONI’s Tor and Psiphon VPN tests to measure the blocking of these circumvention tools.
Your OONI Probe test results will automatically get published on OONI Explorer and on the OONI API. You can opt out from publishing the results in the “Test options” settings of your app.
If you would like to limit your testing to only Tor or Psiphon VPN, please refer to the Configuring your OONI Probe settings section of this guide.
Manually measuring network performance
If you only want to measure network performance, you can do so through the following steps:
Step 1. Tap the Run button in the Dashboard of your OONI Probe mobile app.
Step 2. Tap Deselect all tests at the top of the menu.
Step 3. Choose Performance in the menu of available tests.

Step 4. Tap Run 1 test at the bottom of the screen.

You are now running the NDT speed test, the DASH video streaming performance test, and OONI’s middlebox tests (HTTP Header Field Manipulation test and HTTP Invalid Request Line test).
Your OONI Probe test results will automatically get published on OONI Explorer and on the OONI API.You can opt out from publishing the results in the “Test options” settings of your app.
Disclaimer: The NDT and DASH tests are conducted against third-party servers provided by Measurement Lab (M-Lab). If you run these tests, M-Lab will collect and publish your IP address for research purposes, irrespective of your OONI Probe settings. Learn more about M-Lab’s data governance through its privacy statement.
If you would like to limit your testing to only one (or a few) of the Performance tests, please select only the tests that you want to run instead of selecting all Performance tests.

Setting up automated testing
Instead of running each of the tests manually, you can perform them automatically in the background mode of the app.
You can set up automated testing through the following steps:
Step 1. Enable the “Run tests automatically” option in the “Test options” settings of the app.

If you do not have any restrictions on traffic or battery usage, you can run automated measurements without WiFi connection or charger. To do that, please disable the Only on WiFi and Only while charging settings.

Step 2. In the Dashboard menu open the cards of the test you want to run automatically. In each card (“Websites”, “Instant Messaging”, “Circumvention”, “Performance”, “Experimental”) you will see the Test Settings for each of the tests.
Enable Run tests automatically option if you want to run the test in the background mode.

For the tests that include different types of measurements, you can choose which types of measurements you want to run in the background mode.
For example, if you want test your network only for middleboxes but are not interested in running NDT and DASH tests to test the speed and quality of your connection, you can enable only HTTP tests and disable NDT and DASH tests as in the following screenshot:

Once you enable Automated testing, OONI Probe will run tests of your choice every hour if your device is connected to WiFi and charging (unless you disabled relevant settings in the “Test options” section of the app).
Customizing your website testing
By default, when testing websites with OONI Probe, you measure the URLs included in the Citizen Lab test lists. In other words, if you just tap “Run” (in the Dashboard or Websites card of the OONI Probe app), you will test a random selection of websites taken from the Citizen Lab test lists. These lists have been created through collaboration with in-country researchers and experts. As they are openly available on GitHub, anyone can potentially review them, contribute URLs, and propose the removal of certain URLs. And it is important that we continue reviewing and updating these lists, since they contain the websites that are tested by most OONI Probe users regularly around the world.
But if you would rather limit your testing to websites of your choice, you can do so through the OONI Probe mobile app.
You can customize your website testing in the following ways:
- Limit your testing to specific website categories (such as news media and human rights content);
- Only test websites you care about;
- Test your own list;
- Test all URLs in the (relevant) Citizen Lab test lists (rather than testing a random selection of websites in 90 seconds);
The following sections explain how you can do each of the above.
Testing specific website categories
When you tap “Run” in the OONI Probe app, you test websites from the global and (relevant) country-specific Citizen Lab test lists.
These websites have been categorized based on 30 standardized categories. These categories range from news media, culture, and human rights issues to more provocative or objectionable categories, like pornography (the latter are included because they are more likely to be blocked, enabling the detection of censorship techniques adopted by ISPs).
By default, all 30 categories are enabled in the OONI Probe mobile app to encourage the testing of more diverse websites, enhancing the possibility of discovering more forms of website censorship.
But if you don’t feel comfortable testing all 30 categories of websites (particularly if they include content that is illegal, provocative, or objectionable in your country), or are only interested in testing certain types of content (such as news media), you can limit your OONI Probe testing to the website categories of your choice. The same categories will be tested during the background tests if you enable Automated testing option.
Step 1. Tap Settings in the bottom navigation bar of your OONI Probe mobile app.

Step 2. Tap Test options in the settings.

Step 3. Tap Website categories to test

You will now see the 30 categories of websites that OONI Probe tests by default. All of these categories are enabled.

Step 5. Disable all categories with the button at the top of the screen.

Step 5. Enable the website categories that you want to test.

In the above example, we have enabled 4 categories (“LGBTQI”, “Political Criticism”, “News Media”, “Human Rights”).
You can revisit this setting anytime to enable or disable the website categories of your choice.
Testing websites of your choice
You can test the websites you care about directly through the following steps:
Step 1. Tap the Websites card in your OONI Probe mobile app.
Step 2. Tap the Choose websites button in the Websites card.

You will now see a screen where you can add the website(s) you want to test.

Step 3. Type the URL of the website you want to test. In the following example, we have typed https://www.facebook.com/.

Important: Please ensure that the URL is typed correctly. If it is mis-typed, OONI Probe will not test the intended website and this will potentially lead to inaccurate test results.
A few things to keep in mind:
- Is the website on HTTP or HTTPS? If the latter, please add an extra
safterhttp. - Does the domain include
www? If so, please include it.
To ensure that a URL is typed accurately, please check how it appears when accessed from a normal browser.
Step 4. Tap the plus sign to create a new line for adding another website for testing.
Step 5. Type another URL that you would like to test. In the following example, we have added https://twitter.com/.

If you change your mind and would like to remove any of the URLs you have added, you can do so by tapping on the cross icon next to each URL.
You can continue to add as many URLs as you like.
Step 6. Tap Test URLs to test all of the websites you have added.
You will now see OONI Probe testing the websites of your choice!

Your OONI Probe test results will automatically get published on OONI Explorer and on the OONI API.
Testing a custom list of websites
Manually adding URLs one by one (through the “Choose websites” button of the OONI Probe mobile app) can potentially be tedious – particularly if it involves more than a dozen URLs. Researchers are often interested in testing their own list of websites, which can include hundreds of URLs.
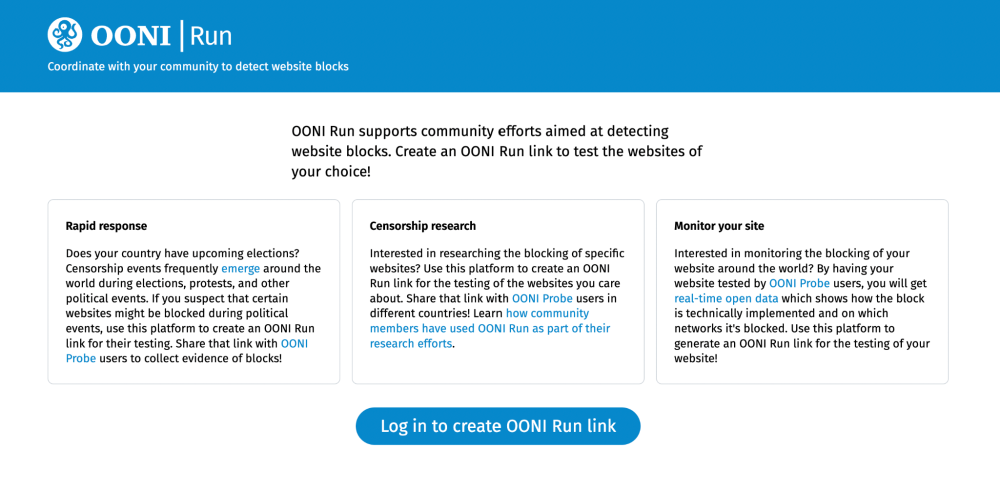
You can create a customized list of websites for testing with OONI Run. With OONI Run, you can test your own list of websites through the following steps:
Step 1. Create an account on OONI Run platform.
Click “Log In To Create OONI Run Link” button and add your email address in the Email slot.
Note: We do not store email addresses when you log in, but only when you create an OONI Run link. We store your email address so that when OONI Probe users receive an OONI Run link from you, they can trust it based on your email address (which is displayed in the OONI Run link you create). This can help reduce the risk of running malicious links.
Once you have added your email address, click the “Send me the Link” button. Click the link (“Please login here”) sent to your email to log into the OONI Run platform.
Step 2. Create your OONI Run link.
You have now logged into the OONI Run platform and can start creating OONI Run links. Here you can customise the title, description, timeframe and a list of URLs for testing. To do this, please use the following instructions:
First of all, add a title for your OONI Run link. Optionally, you can add translations for your title.
Note: This title will appear in the OONI Run link card that testers will install in their OONI Probe mobile app. We recommend using a short title which clearly communicates the type of testing performed. In the above example, we have added “Test social media” as a title because we aim to include social media websites for testing in our OONI Run link.
Next add a short description and a longer description for your OONI Run link. Optionally, you can add translations. This is an opportunity to communicate details about the testing, and why it’s important.
Finally, set an expiration date for your OONI Run link and click “Add URL” to start adding URLs to your OONI Run link.
Step 3. To add a list of URLs, compile your list of websites in a text editor, where each URL is in a separate line. Below we share an example.

Important: Please ensure that each URL is typed correctly. If it is mis-typed, OONI Probe will not test the intended website and this will potentially lead to inaccurate test results.
A few things to keep in mind:
- Is the website on HTTP or HTTPS? If the latter, please add an extra
safterhttp. - Does the domain include
www? If so, please include it. - If the website is on HTTPS (e.g.
https://www.hrw.org/), you don’t need to specify a webpage (e.g.https://www.hrw.org/publications), since ISPs usually cannot limit blocking to a specific webpage when it’s hosted on HTTPS. Rather, they would have to block access to the entire website.
To ensure that each URL is typed accurately, please copy-paste it from a browser.
Once your list is ready, copy your list of URLs (from your text editor) and paste your list of URLs into the first URL slot of the OONI Run page.
You should now see that all of your URLs have populated each URL row in the OONI Run page.

If you notice any empty rows (or otherwise misformatted URLs), please delete them by clicking on the deletion icon.

Step 4. Click the Create Link button to create your OONI Run link.
You will now see your OONI Run link page which includes the title and description that you added, the expiration date of the link, as well as the list of URLs that you added for testing.
Step 5. To share your OONI Run link, click the copy icon next to your OONI Run link in the “Share this link” section. Then share the copied link with OONI Probe Mobile users who you would like to perform testing.
Step 6. Open the link with your OONI Probe mobile app (not with a web browser).

You should now be able to install the shared link in your OONI Probe mobile app if you are using Android device, or see the list of websites for testing if you are using iOS.
Step 7. Install the link, or tap Run to test your list of websites.

Step 8. Find measurements collected by those who ran your OONI Run link.
Once you run some tests, your OONI Probe test results will automatically get published on OONI Explorer and on the OONI API. You can find and aggregate measurements from your specific OONI Run v2 link through OONI Explorer based on the ID of your OONI Run v2 link (“OONI Run Link ID”).
The ID of your OONI Run link are the last digits displayed in the link. In the following example, the OONI Run link ID is 10015.

Paste these digits to the ‘OONI Run Link ID’ field of OONI Explorer MAT or Search interfaces to find measurements collected by all those who ran your OONI Run link through the following steps.
Step 9. Edit the link
If you would like to edit your OONI Run link, click the Edit button in the top right corner.
Alternatively, click the Update Now button next to the link expiration date. Both actions will enable you to edit the data in your OONI Run link.
Once the OONI Run link is updated, it will be automatically updated for all users who have it installed in their OONI Probe application if they have “Install updates automatically” option enabled. Alternatively, they will be able to update the OONI Run link manually.
Note: If you want to learn more about OONI Run, please check out our user guide for OONI Run.
Testing all websites from the Citizen Lab test lists
Due to bandwidth constraints, the OONI Probe mobile app only tests as many websites as it can connect to within 90 seconds (based on the default settings).
If you would like to test all websites from the (relevant) Citizen Lab test lists in one go, you can do so through the following steps:
Step 1. Tap Settings in the bottom navigation bar of your OONI Probe mobile app.
Step 2. Tap Test options in the settings.
Step 3. Disable Limit Websites test duration (in the “Test options” setting).

There is now no time limit in your manual website testing. This means that OONI Probe can test all websites included in the relevant Citizen Lab test lists every time you tap “Run”. This setting won’t apply to the Automated tests.
Alternatively: If you would like to test more websites within a longer time duration (but without necessarily disabling the time limit and testing all websites), you can do so through the following steps:
Step 1. Enable Limit Websites test duration (in the “Test options” setting).

By default, the website testing duration is set to 90 seconds. This means that OONI Probe will only test as many websites (from the relevant Citizen Lab test lists) as it can connect to within 90 seconds.
Step 2. To change the test duration, type the number of seconds that you would like OONI Probe to test websites for. In the following example, we have typed 360 which would make OONI Probe test websites for 6 minutes.

Accessing your OONI Probe test results
As soon as you run an OONI Probe test, you can immediately access the test results directly in your OONI Probe mobile app.
Step 1. Tap Test Results in the bottom navigation bar of your OONI Probe mobile app.

You are now presented with an overview of all your OONI Probe test results.
In the Test Results screen of your OONI Probe mobile app, the results are presented chronologically, with the latest tests listed first.
Step 2. Adjust the Filters to find the results you are interested in. You can filter your test results in two ways:
- By specific type of test (Websites, Instant Messaging, Circumvention, Performance, Experimental, installed OONI Run links)
- By the source of the test (Manual run or Automated run)

Depending on the set filters, you will see different results summary. The summary includes the total number of performed tests, number of tested networks and amount of data used to run the tests.

Step 3. Check test result cards for the tests run by your OONI Probe application.
To access specific test results pertaining to one of the tested websites or services, tap on one of the tests shown on the Results screen.

In each test results card, you will have an overview of:
- Summary of relevant findings (e.g. one website was found to be inaccessible, while 99 were available).
- The date and time of testing (e.g. 2nd April 2025 at 02:35 local time);
- The network (e.g.
AS16010- Magticom Ltd.) on which each test was run;


This overview can potentially help with comparing results across networks (if you run tests on many different networks), and provides a bird’s-eye view of the findings.
To dig deeper (and access the relevant measurement data), you would need to tap on each test result, which we explain in the following sections.
Deleting test results
In the top menu (of the Test Results screen), we share an overview of:
- The number of OONI Probe tests you have run so far;
- The number of networks on which you have run OONI Probe so far;
- Your OONI Probe data usage.
Step 1. If you would like to delete your OONI Probe test results (for example, to save up on storage), tap on the Settings button at the bottom of the screen.
Don’t worry about your test results getting lost; as soon as you run an OONI Probe test, your results are automatically published on OONI Explorer and on the OONI API in near real-time. If you would like to opt out of the publication of your test results, please refer to the “Configuring your OONI Probe settings: Test options" section of this guide.
Step 2. Tap Advanced button.

Step 3. Tap Clear button.

Upon tapping Clear, you will see the following pop-up:

Step 4. Tap Delete if you would like to delete all of your OONI Probe test results. Otherwise, tap Cancel.
Once you delete all of your OONI Probe test results from your device, your Test Results screen should look like this:

Websites
You can access your OONI Probe results from the testing of websites through the following steps:
Step 1. Tap All Types in the Test Results screen of your OONI Probe mobile app.

Step 2. Choose Websites filter (to access the measurements collected with Web Connectivity test).

You will now see a list of all the Web Connectivty tests you have run.

In the top header, we share an overview of your website testing results: the number of Web Connectivity tests run from your device, number of tested networks, amount data used for Web Connectivity test.
Next to each test (which can include multiple tested websites), we share the information about the network where the measurements were collected, date and time of the test, source of the test (Automated testing or Manual testing) and overview of the test results: how many websites were tested and how many showed signs of blocking.
Step 3. Tap on the specific test (to access the measurements collected through this test).

Next to each tested URL, there will either be a green tick (indicating website accessibility), or an orange exclamation mark (indicating potential website blocking).

Step 4. Tap on the row with website test result (to access the data collected through one specific measurement).

You now have access to the OONI Explorer page pertaining to the testing of a specific website. The following measurement page pertains to the testing of https://twitter.com/.

Through this measurement page, you are presented with an overview of the test result. In this case, we can see that https://twitter.org/ was found accessible when tested on Magticom Ltd. (AS16010) on 12th April 2025 at 18:55 UTC time.
If a website was found (potentially) blocked, it would be presented in the website test results with an orange exclamation mark, as illustrated below.

In this case, we can see that http://tribuna.ge/ presented signs of blocking (“anomaly”) when tested on Magticom Ltd (AS16010) on 12th April 2025 at 18:58 UTC time. In particular, we can see that it presented signs of DNS tampering (based on the heuristics of the OONI Web Connectivity test). This means that Magticom Ltd. may have blocked access to http://tribuna.ge/ (on 12th April 2025) by means of DNS tampering.
As false positives can occur, we annotate test results that failed to meet all of the criteria of our Web Connectivity test as “anomalies” (rather than “confirmed blocked”), indicating that the tested website might be blocked.
In evaluating the blocking of a website, it is useful to examine relevant measurements (from the testing of a specific website on the same network over time) in aggregate, which you can do through OONI Explorer (where we publish all test results). OONI Explorer also displays measurements for all “confirmed blocked” cases, where we automatically confirm the blocking of websites based on block pages.
When the testing of a website presents an anomaly, it is particularly important to re-test it (on the same network) as many times as possible, as this can help with ruling out false positives (if, for example, we see a site failing in the same ways every time it is tested). One anomalous measurement alone is often not enough to evaluate blocking (particularly since testing can fail due to several networking reasons, which may have nothing to do with censorship).
Instant Messaging
You can access your OONI Probe results from the testing of instant messaging apps through the following steps:
Step 1. Tap All Types in the Test Results screen of your OONI Probe mobile app.
Step 2. Choose Instant Messaging filter (to access the measurements collected with Instant Messaging tests).

You will now see a list of the instant messaging apps (WhatsApp, Facebook Messenger, Telegram, Signal) that you have tested so far.

In the top header, we share an overview of your website testing results: the number of Instant Messaging tests run from your device, number of tested networks, amount data used for Instant Messaging tests.
Next to each test (which can include multiple tested instant messaging apps), we share the information about the network where the measurements were collected, date and time of the test, source of the test (Automated testing or Manual testing) and overview of the test results: which applications were tested and how many showed signs of blocking.
Step 3. Tap on the specific test (to access the measurements collected through this test).

Next to each tested app, there will either be a green tick (indicating app reachability), or an orange exclamation mark (indicating potential app blocking).
Step 4. Tap on the row of a tested app (to access the data from the testing of that app).

The following measurement page pertains to the testing of WhatsApp.

Through this measurement page, you are presented with an overview of the WhatsApp test result. In this case, we can see that WhatsApp was found accessible when tested on JSC Silknet (AS35805) on 12th April 2025 at 10:41 UTC. This conclusion is reached because OONI’s WhatsApp test was able to successfully connect to WhatsApp’s endpoints, registration service, and web interface (web.whatsapp.com).
If WhatsApp was found (potentially) blocked, this test result would show an orange exclamation mark and information about why it’s potentially blocked (based on the heuristics of OONI’s WhatsApp test).
In all cases, we recommend referring to OONI measurements published on OONI Explorer, where you can examine results in aggregate (which can help with ruling out false positives and confirming blocking).
Circumvention
You can access your OONI Probe results from the testing of circumvention tools through the following steps:
Step 1. Tap All Types in the Test Results screen of your OONI Probe mobile app.
Step 2. Choose Circumvention filter (to access the measurements collected with Circumvention tests).

You will now see a list of the circumvention tools (Tor, Psiphon VPN) that you have tested so far.

In the top header, we share an overview of your circumvention tools testing results: the number of tests run from your device, number of tested networks, amount data used for the testisng of circumvention tools.
You will now see a list of the censorship circumvention tools (Psiphon, Tor) that you have tested so far.
Step 3. Tap on the specific test (to access the measurements collected through this test).

Next to each tested service, there will either be a green tick (indicating app reachability), or an orange exclamation mark (indicating potential app blocking).
Step 4. Tap on the row of a tested tool (to access the data from its testing).

The following measurement page pertains to the testing of Psiphon.

Through this measurement page, you are presented with an overview of the Psiphon test result. In this case, we can see that Psiphon was reachable when tested on JSC Silknet (AS35805) on 12th April 2025 at 10:41 UTC. This conclusion is reached because OONI’s Psiphon test was able to successfully bootstrap a Psiphon connection.
If Psiphon was found (potentially) blocked, this test result would show an orange exclamation mark and information about why it’s potentially blocked (based on the heuristics of OONI’s Psiphon test).
Similarly, you can access Tor test results through the circumvention results in your OONI Probe app.


In this case, we can see that Tor was reachable when tested on JSC Silknet (AS35805) on 12th April 2025 at 10:41 UTC. This conclusion is reached because OONI’s Tor test was able to successfully connect to most of the default Tor bridges and to all Tor directory authorities.
If Tor was found (potentially) blocked, this test result would show an orange exclamation mark and information about why it’s potentially blocked (based on the heuristics of OONI’s Tor test).
Performance
You can access your OONI Probe results from the testing of your network’s performance through the following steps:
Step 1. Tap All Types in the Test Results screen of your OONI Probe mobile app.
Step 2. Choose Performance filter (to access the measurements collected with Performance tests).

You will now see a list of the Performance tests that you have run so far.

In the top header, we share an overview of your performance testing results: the number of tests run from your device, number of tested networks, amount data used for the testing of your network’s performance.
Step 3. Tap on the row of a test result (to access relevant data).


The following measurement page is from an HTTP Header Filed Manipulation Test.

In this case, we can see that an HTTP Header Filed Manipulation Test was run on JSC Silknet (AS35805) on 12th April 2025 at 15:42 UTC. When this test was performed, it sent an invalid HTTP request line (containing an invalid HTTP version number, an invalid field count and a huge request method) to an echo service listening on the standard HTTP port. The echo service (a debugging and measurement tool which simply sends back any data it receives) sent the invalid HTTP request line back to us, exactly as it received it. This indicates that there is no visible middlebox or traffic manipulation on the tested network.
If, however, a middlebox was present on the tested network, the invalid HTTP request line would have been intercepted by the middlebox, potentially triggering an error that would have been sent back to us by the echo service. Such errors indicate that software for traffic manipulation is likely placed on the tested network, though it’s not always clear what that software is.
Sharing your OONI Probe test results
Please note that sharing your test results and accessing actual data collected througout the test is possible only if you consent to automatically publishing test results (see the next section “Configuring your OONI Probe settings”).
For each OONI Probe test result uploaded to OONI Explorer, you can:
- Access and share your measurement published on OONI Explorer;
- Share the measurement with your contacts;
- Access the raw data of your measurement;
Accessing your measurement on OONI Explorer
Access any OONI Probe test result (for details on how to find OONI Probe test results, please refer to the previous section of this guide).
The app will redirect you to the OONI Explorer page relevant to your measurement. For the twitter.com example that would be the following page: https://explorer.ooni.org/measurement/20250412T223736Z_webconnectivity_GE_35805_n1_FChoKxU5f9ZojAkb?input=https%3A%2F%2Ftwitter.com%2F
OONI Explorer page includes actual data (i.e. the raw measurement data) for each measurement collected through your app.
It is useful to access the raw measurement data because:
- It provides technical details that can potentially serve as evidence of blocking;
- It can help with determining if a website is in fact blocked, or if its testing triggered an anomaly due to other, non-censorship related reasons (i.e. ruling out false positives).
Sharing your measurement
You can share your OONI Probe measurements using OONI Explorer link through the Share button in an OONI Probe test result or by manually copying and sharing this link.
Configuring your OONI Probe settings
You can customize your use of OONI Probe through the settings.
Step 1. Tap Settings in the bottom navigation bar of your OONI Probe app.
You can now see all of the OONI Probe app settings.
In the following sections, we walk you through each setting.
Test options: Automatically Publish Results
Tap Test options in the settings.
By default, the automatic publication of your OONI Probe test results is enabled (unless you opted-in during the onboarding).

We encourage the publication of OONI Probe test results because they can help increase transparency of internet censorship and support the research and advocacy efforts of the internet freedom community.
If you publish your OONI Probe test results, that will involve the following data:
- Date and time of measurement;
- Country code (e.g.
GEfor Georgia); - Network information: ASN (e.g., AS16010 for
Magticom Ltd.) and whether a test was run on WiFi or using mobile data; - Network measurement data (which depends on the OONI Probe test).
Further information is available through our Data Policy.
Test options: Automated testing
Instead of having to remember to manually run tests, you can enable automated testing in the settings of your OONI Probe app and OONI Probe will run tests automatically for you!
By enabling automated testing, OONI Probe will run all tests in the background multiple times per day (excluding the bandwidth-intensive performance tests), testing a different set of websites (from the Citizen Lab test lists) each time.
With automated OONI Probe testing, you can regularly contribute censorship measurements (without having to do anything), enabling the internet freedom community to monitor and detect censorship events in your country over time. If you are concerned about traffic consumption or risks connected with regular testing of specific websites categories, you can limit the types of tests to be ran through the Run menu or limit list of categories to be tested through Test options section of OONI Probe settings. You can also limit types of tests to be run automatically through the Dashboard menu of the app.
You can enable automated OONI Probe testing through the following steps:
Step 1. Tap Settings in the bottom navigation bar of your OONI Probe app and tap the Test options button.
You will see that the Run tests automatically option of the settings is disabled by default.

Step 2. Enable the Run tests automatically option in the settings.
You have now enabled automated OONI Probe testing! OONI Probe will run tests automatically multiple times per day (without user intervention) once your device is connected to WiFi and charging. All test results will automatically get published on OONI Explorer.
If you do not have any restrictions on traffic or battery usage, you can run automated measurements without WiFi connection or charger. To do that, please disable the Only on WiFi and Only while charging settings.
Important: If you have a VPN enabled, OONI Probe will not run tests automatically. Please turn-off your VPN for automated OONI Probe testing.
Privacy
The Privacy tab of the OONI Probe settings pertains to the submission of crash reports.
Step 1. Tap Privacy through the settings of the OONI Probe app.

If you opt in to sharing crash reports with us, you will share information that is essential for identifying bugs and improving the performance of the OONI Probe app. These crash reports include information about why and how a specific OONI Probe function failed to work as expected.

You can opt out of sharing crash reports with us by disabling the relevant setting.
OONI backend proxy
This option is only necessary if the OONI Probe app does not work in your country. If your app shows “Error – all available probe services failed”, this means that OONI Probe attempted to contact all the public OONI API endpoints (which we call “probe services”) but they were not available to reach them.

By tapping the OONI backend proxy setting, you will be able to choose which proxy you want to use to circumvent potential (deliberate or accidental) OONI Probe blocking.

By default, all proxies are disabled.

If you select Psiphon, OONI Probe will use Psiphon when speaking to the probe services.

If you select Custom Proxy, you can set the hostname and port of a SOCKS5 proxy. For example, the hostname and port with 127.0.0.1 and 9050 can be used if you have an Orbot instance running on your device (or Tor inside Termux).

By enabling an OONI backend proxy, OONI Probe would not be running over a VPN. Instead, OONI Probe would use Psiphon or a custom proxy (depending on what you chose) to circumvent potential blocking of OONI backend services.
Advanced
The advanced settings of the OONI Probe app include settings for:
- Accessing the recent logs of your OONI Probe app;
- Sharing logs for debugging purposes;
- Receiving a warning when your VPN is in use.
- Clearing your OONI Probe storage;
You can access the advanced settings through the following steps:
Tap Advanced through the settings of your OONI Probe app.
Sharing logs for debugging purposes
You now have access to the advanced settings of your OONI Probe app, where Debug logs are disabled by default and the VPN warning is enabled by default for all OONI Probe users.

Enable the Debug logs to share information (e.g. OONI Probe software version) that can help us identify and fix OONI Probe bugs.
Receiving a warning when your VPN in use
It’s important to have your VPN turned off when running OONI Probe to help ensure more accurate test results. Please enable the VPN warning if you would like to be notified when your VPN is turned on.
Clearing your OONI Probe storage
Tap the CLEAR button if you would like to delete your OONI Probe tests to save up on storage space.

This will prompt the following pop-up window, asking if you would like to delete all of your OONI Probe test results. All of your OONI Probe test results have already been published on OONI Explorer (unless you opted-out of the publication of results in the Test options of the settings).
Step 5. Tap DELETE to delete all of your OONI Probe test results (and save up on storage).
All of your OONI Probe test results have been deleted from your app.
Send email to support
If you are encountering issues with OONI Probe and need support, we encourage you to reach out to us. You can do so through the following steps:
Step 1. Tap Send email to support through the settings of the OONI Probe app.

This will prompt you to send an email through one of your email clients on your phone.
Step 2. Write an email, describing the issues you’re experiencing with OONI Probe. It might be useful to share the log and/or raw measurement data with us (as explained in the “Sharing your OONI Probe test results” section of this guide), depending on the problem.
Step 3. Send your email to contact@openobservatory.org.
If you need urgent assistance from the OONI team, we encourage you to reach out to us on the OONI Slack channel, where we can chat in real-time.
About OONI
The final “About OONI” setting of the OONI Probe app shares information about OONI and about the OONI Probe software version you’re currently using.
Step 1. Tap About OONI through the settings of your OONI Probe app.

This will open a screen that provides summary information about OONI, as well as the OONI Probe software version that you’re currently using. In the header of the following example, we can see that it’s OONI Probe 5.0.5.

Step 2. Tap the Learn more button to access the OONI website and learn more about our project.
Step 3. Tap Blog to access the OONI blog and check our announcements.
Step 4. Tap Reports to read our research reports on internet censorship around the world (based on OONI data).
Step 5. Tap OONI Data Policy to read our Data Policy.
Thank you for reading this guide, and thank you for running OONI Probe!